
I am intrigued with wet felting and the results which come of such hard work.
And believe me, once you have done it, you will know...
It is hard work!
I found a very good tutorial on rosiepink a fabulous felters blog.
Just look under her list of tutorials for the
"how to make a felted pod".
I have tried wet felting before without the desired effect I wanted to achieve
and so when I did this tutorial, I was thrilled with the results.
My arms were tired, but like I said, I was thrilled.
It goes something like this...
Begin with a dessert plate sized circle cut from thick, soft
plastic. I used laminate flooring underlay...

Next you take your tufts of roving and lay them like a sunburst,
half on and half off your resist (the plastic)
(put the piece on a large piece of bubble wrap with another piece handy for later)

Next lay your tufts of roving across the centre to fill it in...

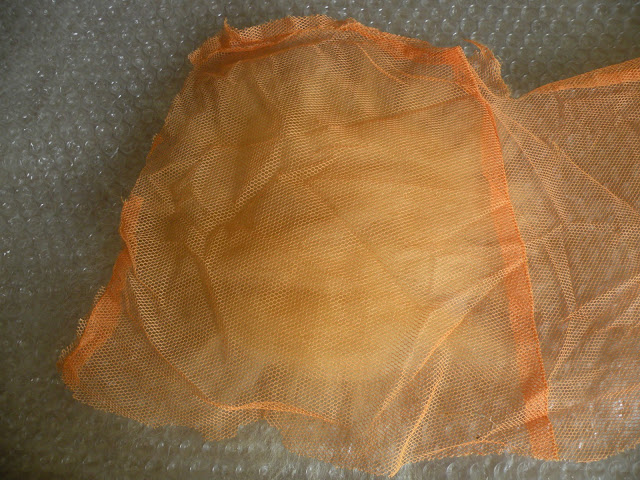
Cover with netting and sprinkle warm, soapy water over and then
gently sponge it around (just over the plastic section) without disturbing the roving...


Take your warm, soapy fingers and GENTLY rub all over the piece
in small circular motions for about 5 minutes...

Remove the netting ever so gently and slowly, freeing any trapped fibres.
Put the other piece of bubble wrap on top and give
it a friendly squeeze to make a seal.
Remove the bubble wrap slowly and with wet soapy fingers, turn over
the outside bits of roving into the circle...


As you can see I've used two different colours which will become evident later.
Now you will gently turn it over and repeat this process but lay the inside
bits in the opposite direction than the previous layers.

You will need to do 4 layers on each side.
It will eventually look like the thickness of a fluffy pancake...


Cover again with bubble wrap and take a sushi roller or a piece of a
bamboo blind or a pool noodle and roll the whole thing up...

Roll, roll, roll 30 times and then open it up and turn it a 1/4 turn.
Then roll it again until you've completed 4 turns.
Then you turn it over, roll it up and
roll, roll, roll again....are you getting tired yet?
No? Good because we're not done yet!
Remove from the bubble wrap and carefully cut whatever sized hole you want
WITHOUT cutting into the resist (the circle of plastic) or the other side of it...

Pull out the resist out and pinch the edges with wet soapy fingers.
Then you put it back into the bubble wrap and roll, roll again!!
Next you get your tool of choice, (mine was a small ladle)
and shape the bowl. You see the plastic has given it a hollow centre...


Work it until you`re happy with the shape and then gently rinse
all of the soap out in hot and cold water.
Set it on top of something to dry upside down...vitamin jars work well...

You will be amazed at the beautiful marriage of the fibres!
That is what I love about this technique...


Soap, water, wool and elbow grease have kept
this technique alive for thousands of years.
If I`ve left anything out, check out the link I provided.
Oh, and the second tale of felting is this...


A needle felted barn owl on an antique wooden spool
I made for a friend.
My comfort zone lies here but I am definitely going to make
more of the wet felted pods.
It gives me a buzz to get onto something new.
9 comments:
I've only ever done wet felting (dabbled, you could say), and yes it's both exhausting and thrilling! I've always admired needle felting, and I actually think it would suit me much better, being a needle lover and all. It's definitely on my list.
Your little owl is just adorable. Do you take orders? :-)
you are such a fabulous artist...how is that one you were working on for submission to a competition a while back
that I fainted when I saw it?
Love the owl
Must go and visit etsy
I need me some felting
OMG!! I had no idea it would turn out to be a bowl!
I did a teeny bit of wet felting for my large textile art project - and yes, it sure is hard work! I didn't think I would ever felt again, but now that I've seen how to make a bowl I may do it!
Thanks! Can't wait to see what more you'll be doing with your wet felting.
I actually haven't come across felting like this before - your work is beautiful.
Val: I'm thinking ducks or bees along the sides!
Mairead: Thankyou so much!
you are such an artist..the shape of that bowl is super lovely. mine would end up looking like a bad ladle. i want this!
Beautiful!! This is truly a case of hard work. Wet felting is probably the most labor intensive art ever.
Very nice job.
You owl is just charming. You do this so well. Each has a personality and a soul.
You did a fabulous job on the pod - love the colours you used!
Your needle felted owl is so sweet! You've captured the pose and expression perfectly.
Beautiful owl!
Post a Comment